
Before you start
- A lobstr.io account with a Squid you’ve already configured.
- An AWS account. If you don’t have one, sign up with AWS first.
Part 1 — Set up AWS
1
Create an S3 bucket
Open the S3 console and click Create bucket. Set the region using the dropdown in the top-right corner before you start.Enter a globally unique bucket name using only lowercase letters, numbers, and hyphens.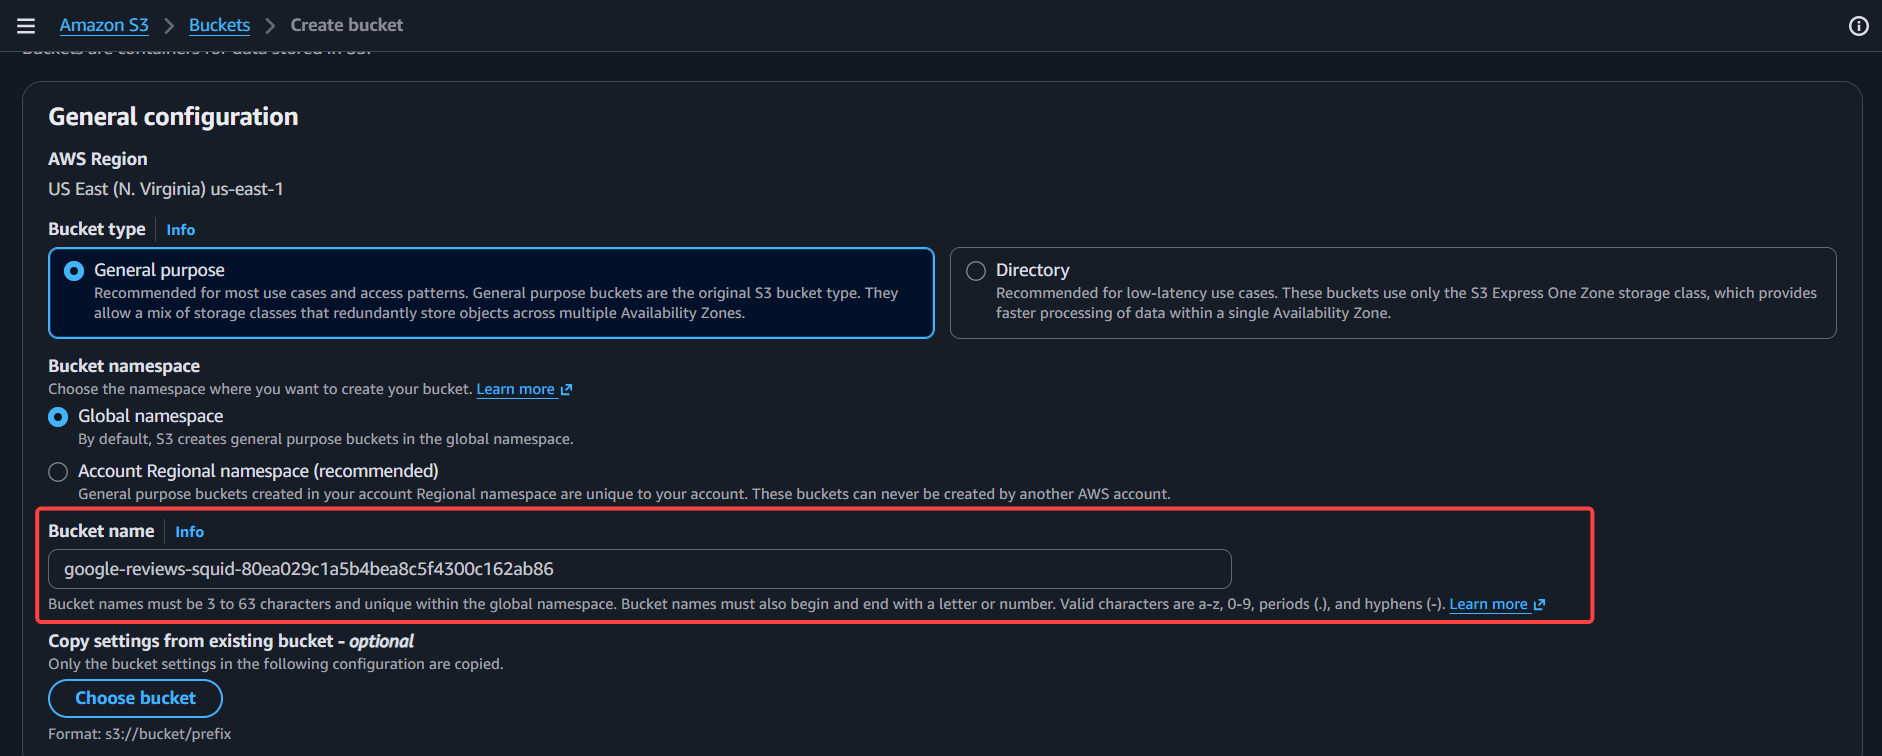
2
Create a permissions policy
Go to IAM → Policies → Create policy. Switch the editor to the JSON tab and replace the contents with this, substituting your own bucket name: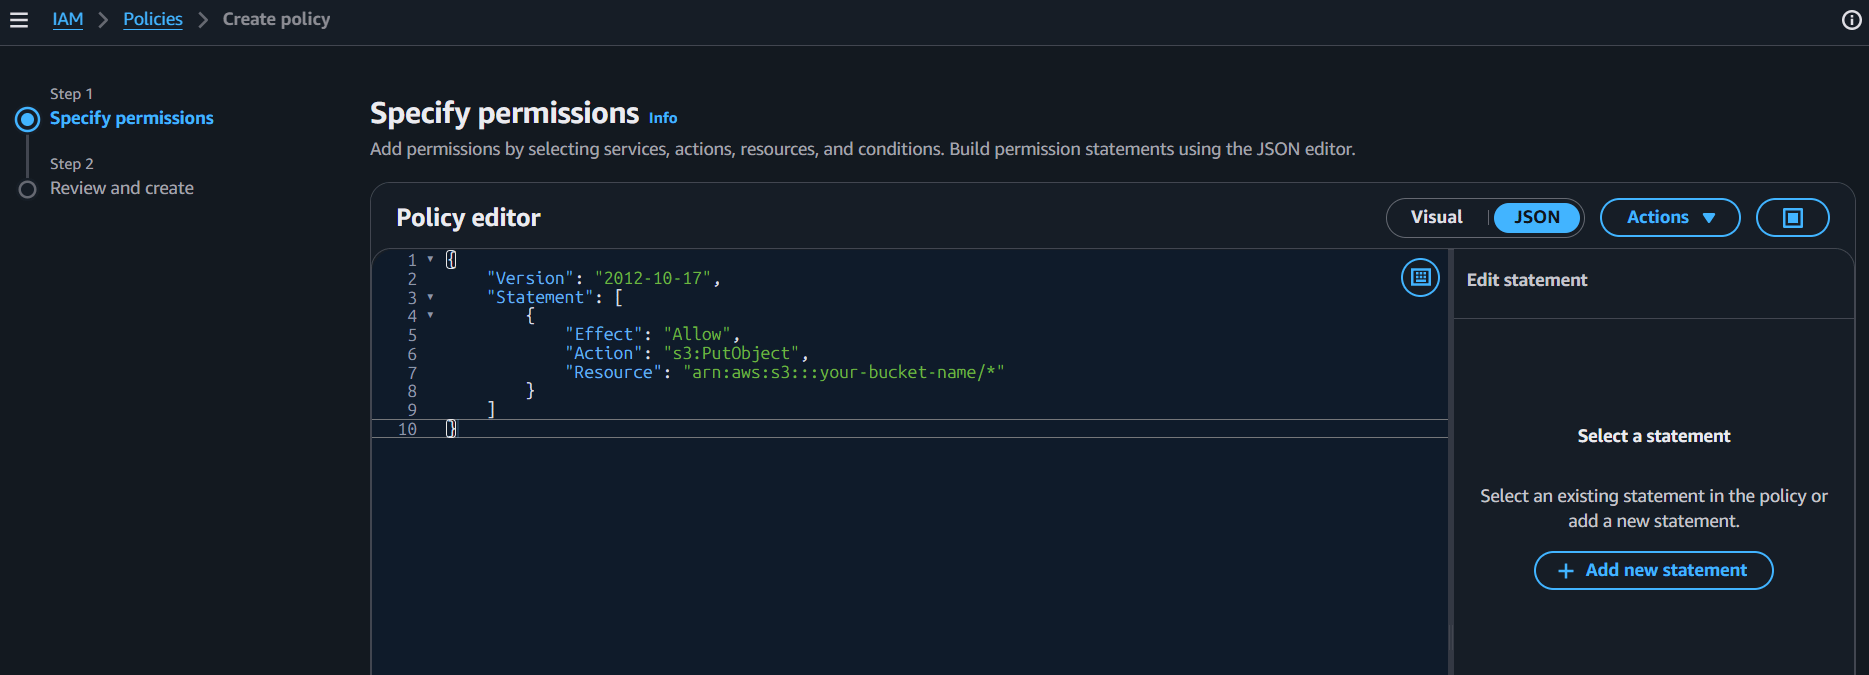
lobstr-delivery-write, and click Create policy.This grants permission to write files to that one bucket and nothing else — it can’t read, can’t delete, and can’t touch any other bucket in your account.3
Create a dedicated IAM user
In IAM, go to Users and click Create user. Name it 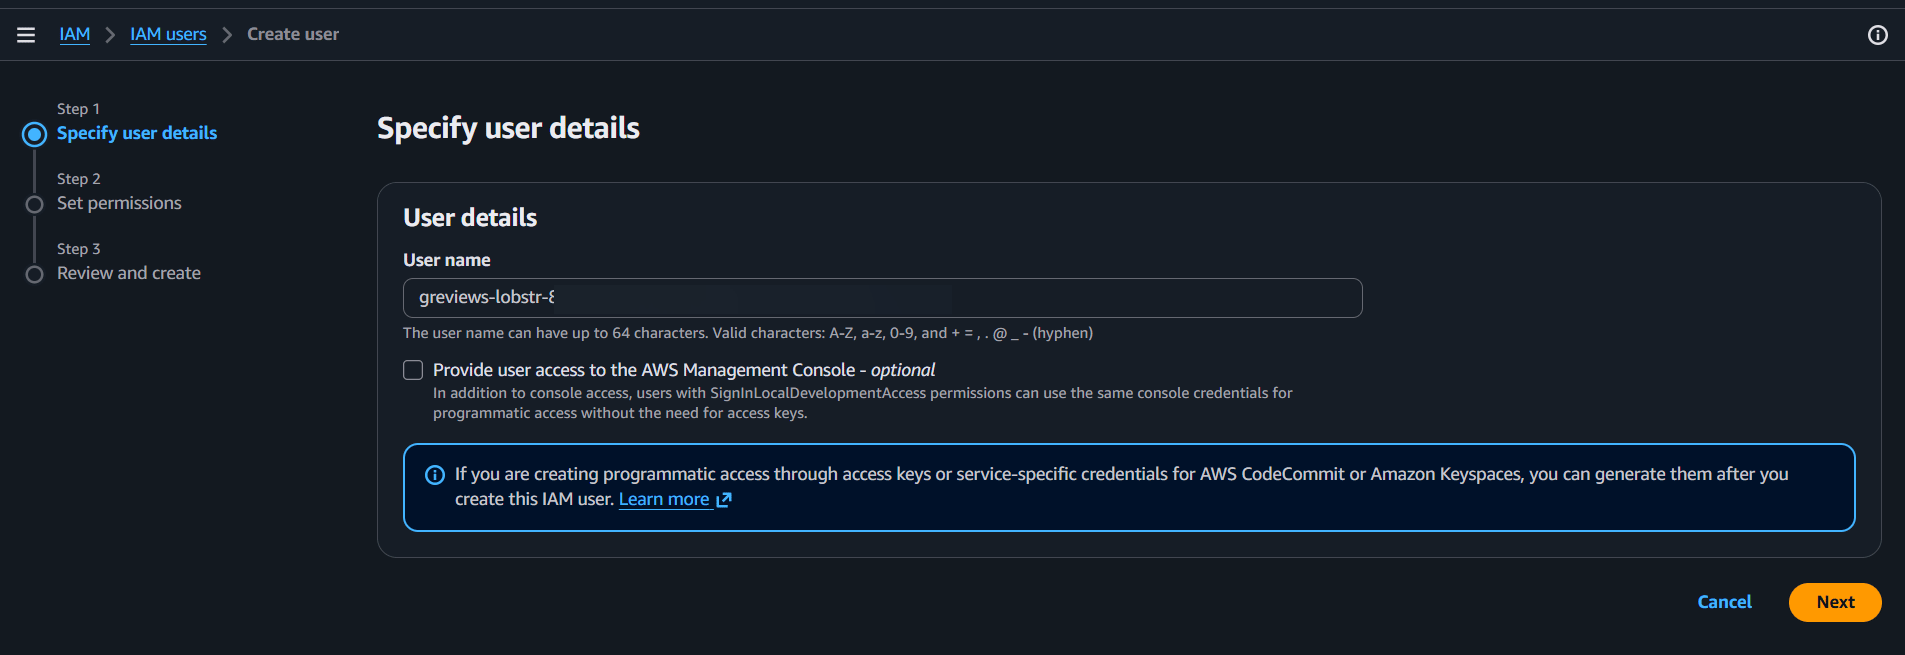
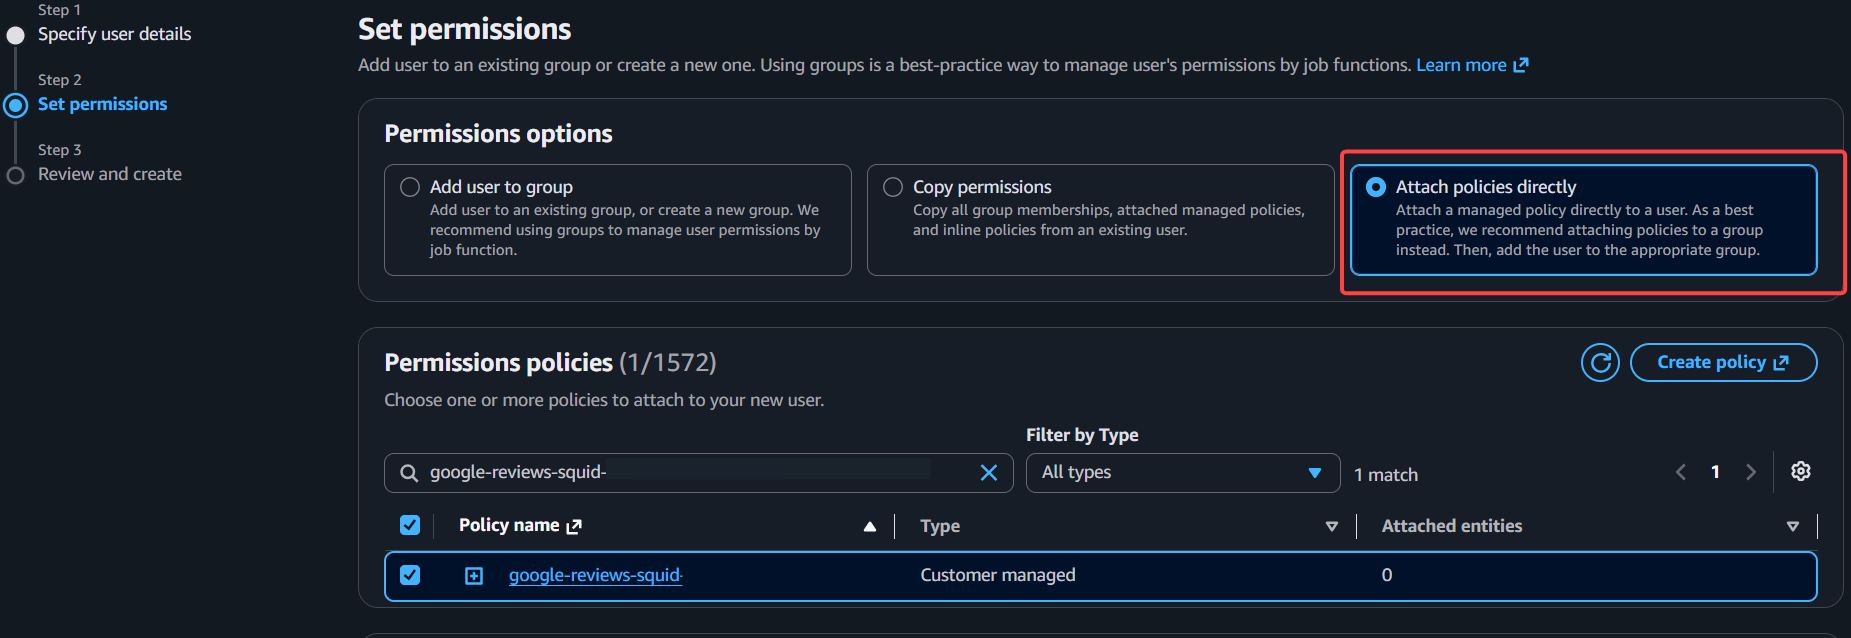
lobstr-delivery and leave the console-access checkbox unticked — this user authenticates with keys only.lobstr-delivery-write, then click through and create the user.4
Generate access keys
Open the new user and click Create access key in the Access key 1 panel.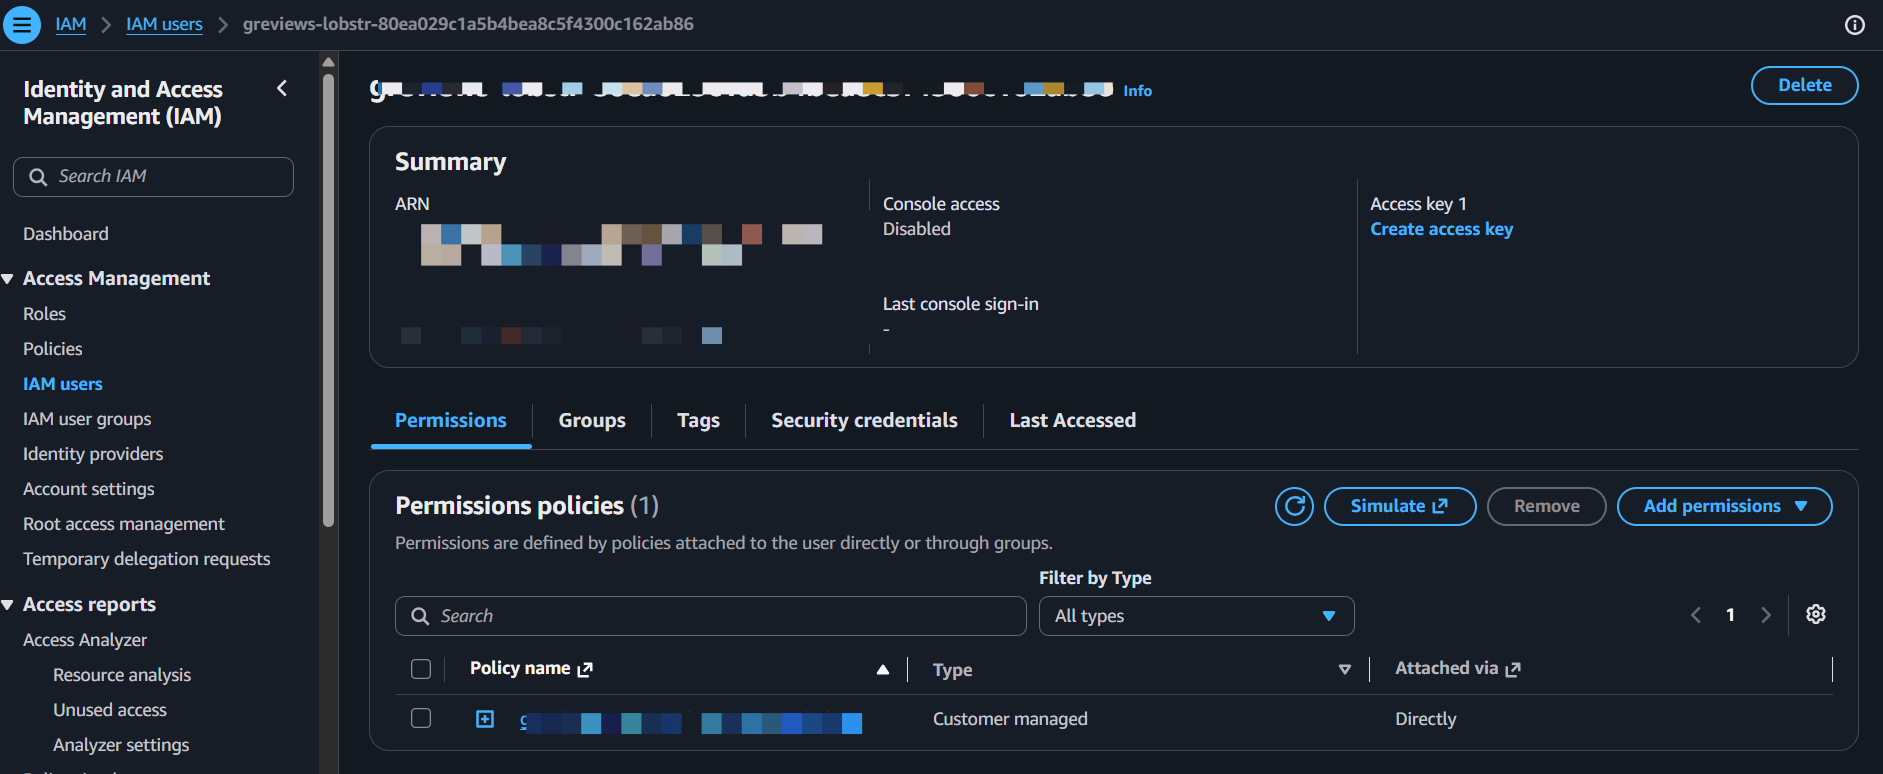
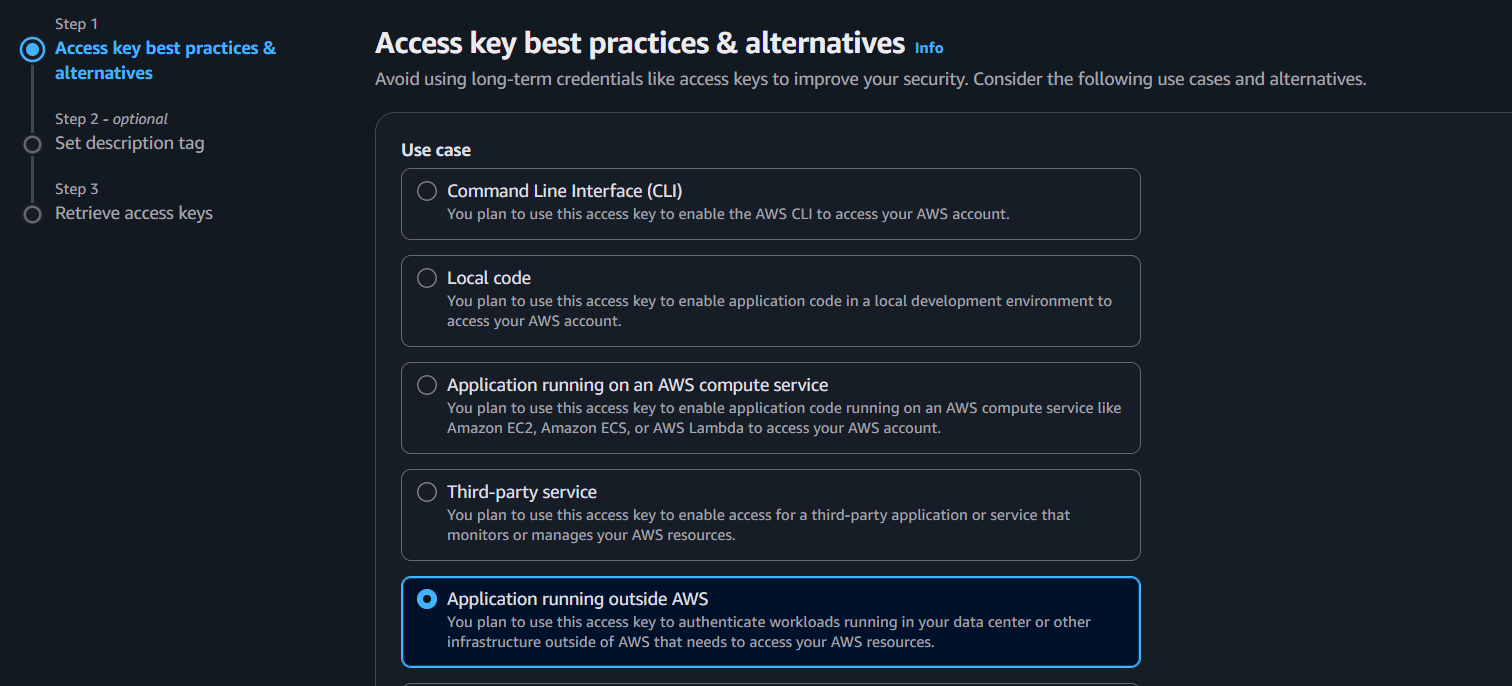
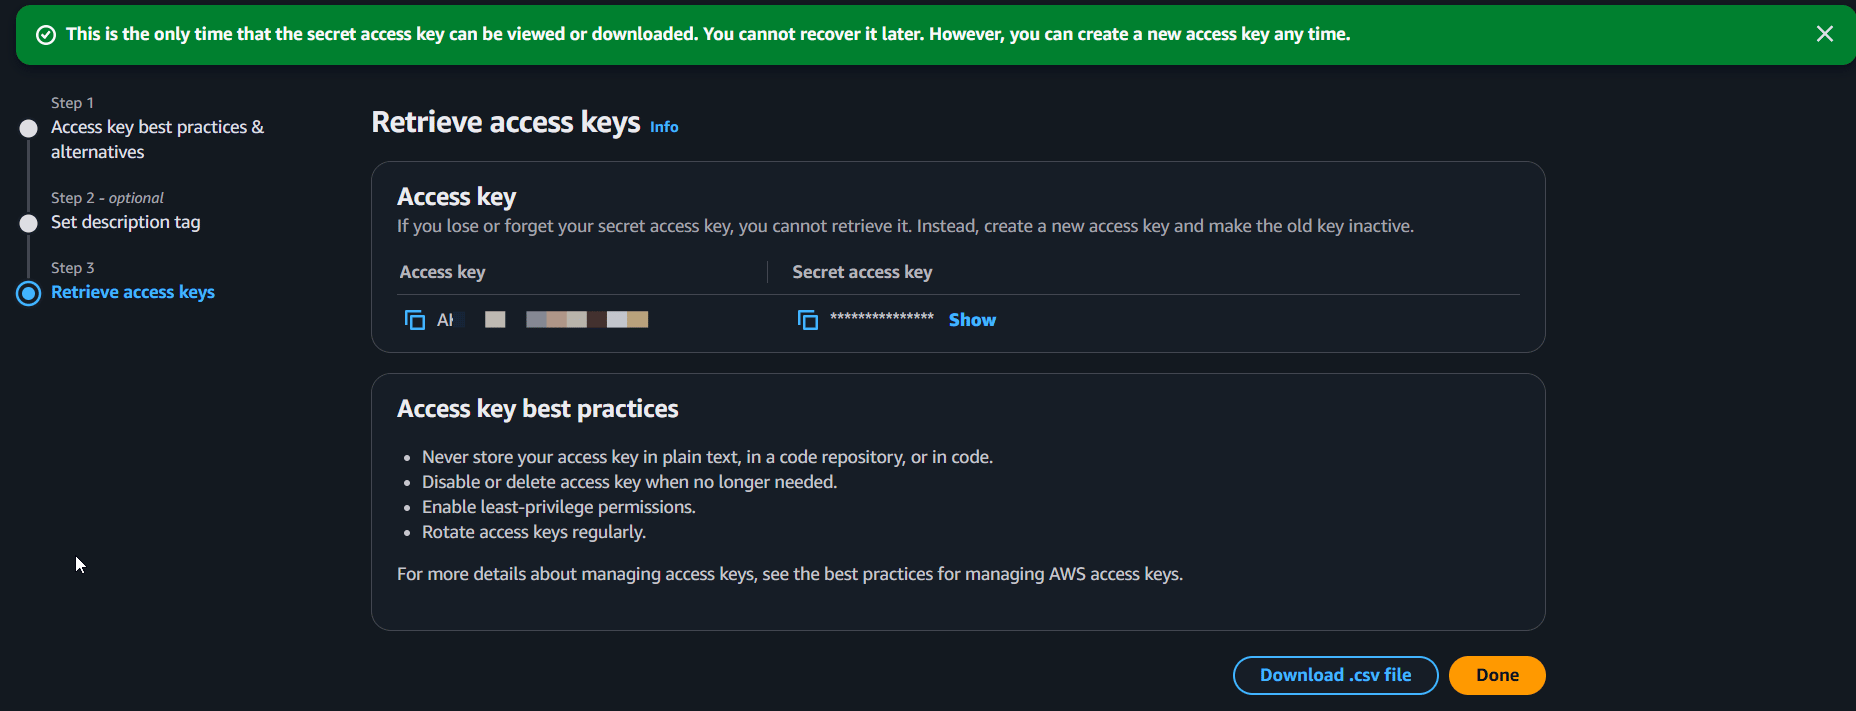
Part 2 — Connect it to your Squid
1
Add S3 as a delivery method
In your lobstr.io dashboard, open the Squid, go to its Delivery settings, and expand the Amazon s3 section.Enter the bucket name in Bucket, then paste the access key and secret key into their fields.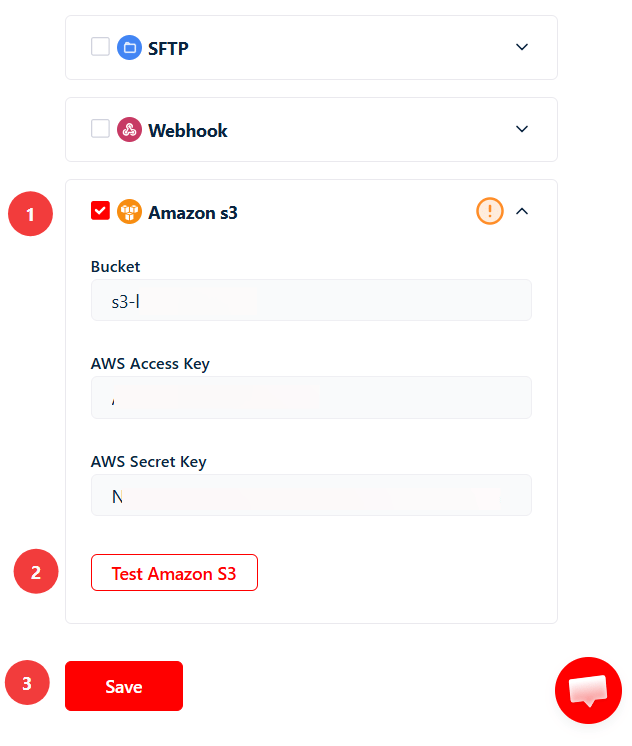
Enter the bucket name on its own —
my-bucket, not the full s3://my-bucket URL.2
Test the connection
Click Test Amazon S3 before saving. A pass confirms the credentials and permissions are correct.If it fails with an access-denied error, the bucket name in the policy ARN doesn’t match the bucket name in the form.
3
Enable and save
Tick the checkbox beside Amazon s3 to activate the integration, then click Save.
4
Run the Squid and verify
Click Launch. When the run completes, open the bucket in the S3 console — the results file appears there within about a minute.Files land at the root of the bucket, named after the Squid plus the run’s UTC timestamp: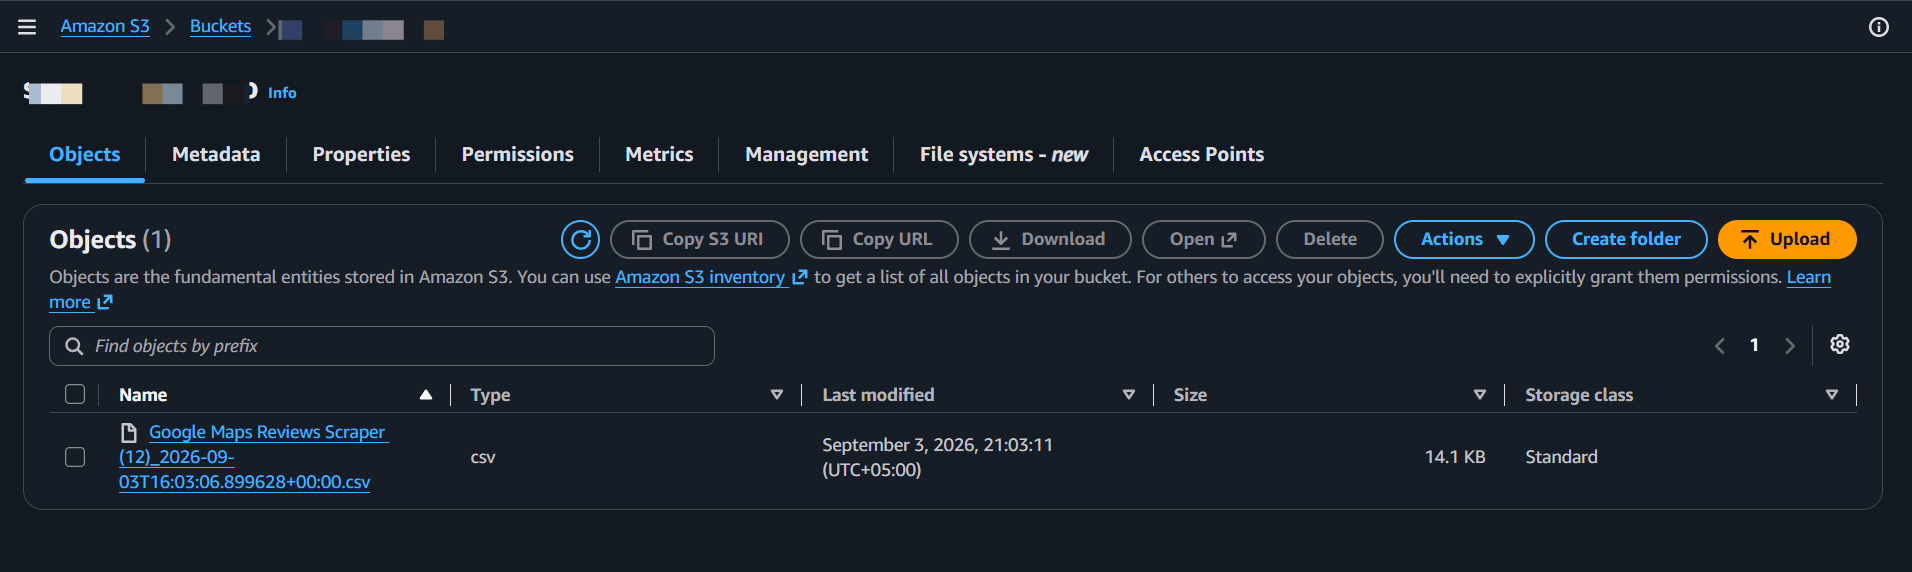
Troubleshooting
Access denied
Access denied
The bucket name in the policy ARN doesn’t match the bucket you entered in lobstr.io. Open the policy in IAM and check the
Resource line — it needs your real bucket name and must end in /*.No such bucket
No such bucket
Either the bucket name is mistyped, or the bucket is in a different region than the one you’re looking at. Bucket names are global, so a typo can also mean you’re pointing at a bucket that isn’t yours.
Invalid credentials
Invalid credentials
Usually the secret key was copied with trailing whitespace. Re-paste both values carefully. If the secret is lost, create a new access key in IAM and deactivate the old one.
The test passes but no files appear
The test passes but no files appear
Check the Amazon s3 checkbox is ticked and that you clicked Save. A successful test doesn’t activate the delivery on its own.
Things to know
- Delivery applies to future runs only. Runs that finished before you set this up aren’t uploaded retroactively. To backfill, download past runs from the Runs table and upload the files yourself.
- S3 delivery is per Squid. Configure it separately on each Squid you want writing to a bucket.
- You can combine delivery channels. Amazon S3, Google Sheets, SFTP, email, and webhooks each have their own checkbox in the Delivery panel and can all be active at the same time.
- Rotate the key if it’s ever exposed. Create a new access key in IAM, paste it into the Delivery panel, save, then deactivate the old key. The narrow policy means the worst case is writes to one bucket — which is exactly why the dedicated user is worth the extra two minutes.